St. Louis Native DIY Backyard Wildflower Garden & Dry Creek Bed Renovation
Hello there! I’m Leslie, and I’ve been working at Pure Air Natives for two years. I process sales, provide ecological advice to customers, and manage the Facebook page for Pure Air Natives. During the pandemic, I built a DIY dry creek bed in my backyard and started a native wildflower garden around it. I want to share my personal journey with you, in hopes that it can help you incorporate native plants into your life.
This native plant “case study” was me putting into practice what I help others do every day at work.
When things shut down in March 2020, I was one of the millions of people transitioning to working at home. During that spring, my partner and I finally had the time to solve our problem with water leaking into the basement during spring rains by replacing the French drain running through our backyard.
I felt it was the perfect opportunity to make a native flower garden. I’m a big wildlife enthusiast, and I knew that planting native seeds would attract pollinators and other animals to our yard.
To learn more about native plants, check out our native gardening FAQ page for resources and links.
What Is A French Drain?
A French drain involves digging a trench and placing a corrugated pipe with small rocks/gravel around it. Its purpose is to drain water away from your home and prevent water damage.
Since our basement was flooding every time there was a heavy rain, we realized that our French drain was not functioning well and needed to be replaced. Thankfully, it was a straightforward fix, so we just decided to do it ourselves.
Many people cover theirs with soil, we decided to cover ours with rock and make it a dry creek bed and surround it with wildflowers instead. The wildflowers would not only brighten up the space and make it look more natural, but help the local ecosystem too.
What Is A Dry Creek Bed?
A dry creek bed, also known as a dry stream bed, is a very effective drainage solution. This landscaping design uses rock to mimic the way a natural stream bed would look in nature.
Water naturally pools in that area (on top of the slope) and trickles down to our home. Having a dry creek bed would force the water to collect there and avoid leaking into our house and causing water damage.
In our case, we would be using a French drain but landscaping it to look more like a dry creek bed. Of course, the wildflowers will play an important role in making it blend in to its surrounding landscape.
Planning And Building The Dry Creek Bed In My Backyard
Here’s our step by step process of what we bought to repair the French drain, build a dry creek bed, and pick out which native plants to plant.
1. Planned Pipe Path & Shopping List
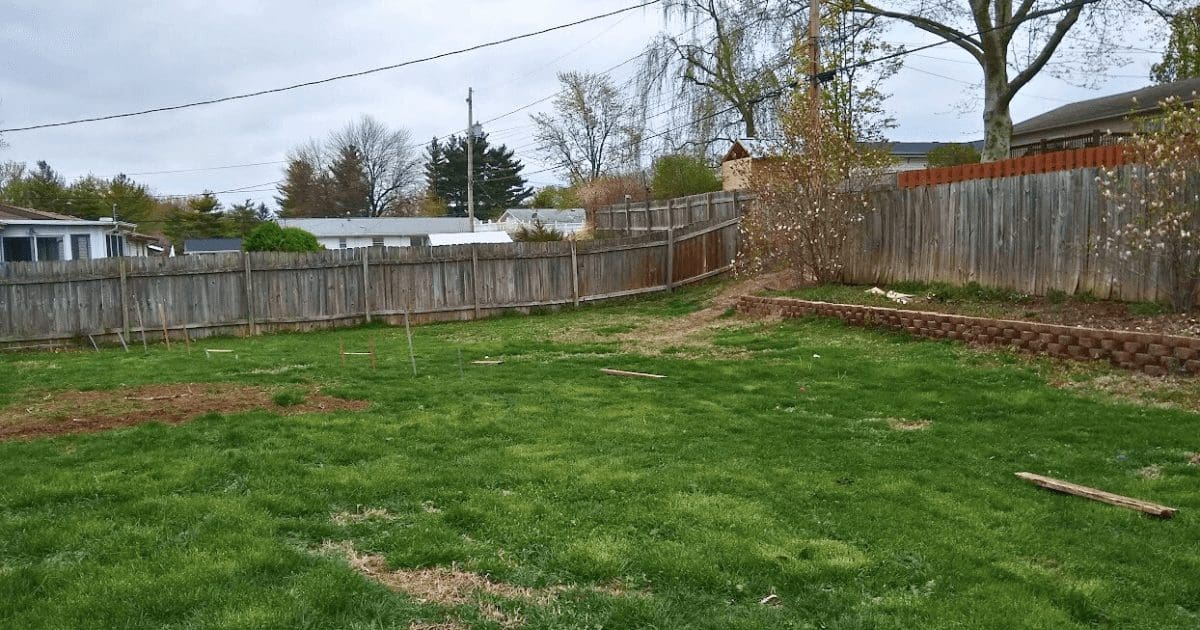
My partner and I first planned out what we needed to buy. Though I already had an idea which native plants I wanted to get from work, the most important part was making sure the new French drain will work properly.
Based on online research, I bought corrugated pipe, landscape fabric, gravel, and creek rocks. We laid out the path of our new French drain. From the high point in the yard to the low point in the corner near a drain on the back corner of our house, we had a 90 ft curved line.
2. Replaced Old Pipe & Prepped Land For Native Plants
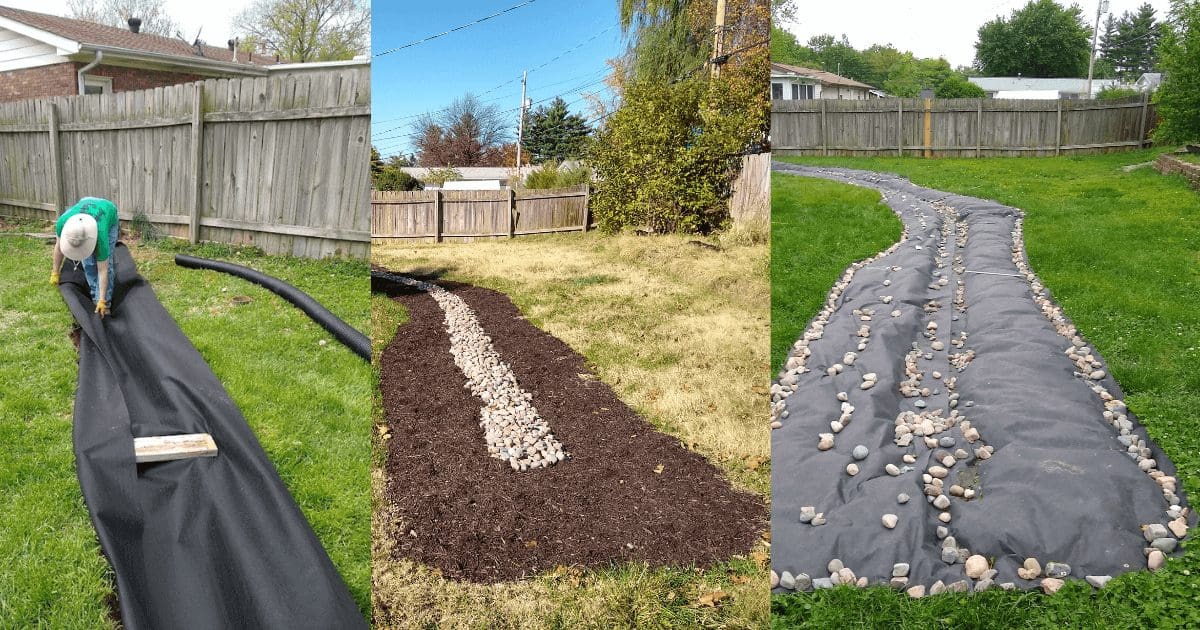
Once we had our tools and route laid out, my partner and I got to work digging. We followed the line, digging 2 ft deep. When we encountered the old pipe, we tore it out. Once our line was dug, we laid down the landscape fabric over the trench, put in the pipe, and weighed it down with gravel.
On top of the gravel we added the creek rock. We laid some of our remaining landscape fabric on both sides of the trench and cut the edges to create the shape of the design for our flower garden and weighed it down with some rocks. We finished this part of the process in mid-May and left the spot covered until January 2021.
Fun fact: I’ve learned since then that you can cover the site for even less time and you can use other materials such as white or black plastic, cardboard, newspaper covered in compost, or you can even just dig up the sod and flip it upside down.
While the ground was preparing, I picked my native seeds. I decided to buy wildflower seed packets of individual species instead of a premade or custom mix, though Pure Air Natives offers both. I chose a variety of species that would give me blooms all season and with a range of colors. Since Monarch butterflies are endangered, I picked 2 varieties of milkweed to provide them with a food source.
Here is the custom wildflower mix I planted:
- Blue Sage (Salvia azurea)
- Lanceleaf Coreopsis (Coreopsis lanceolata)
- Black-eyed Susan (Rudbeckia hirta)
- Butterfly Milkweed (Asclepias tuberosa)
- Purple Coneflower (Echinacea purpurea)
- Common Milkweed (Asclepias syriaca)
My backyard has full sun and with the French drain below the landscape, I fully expected my area to drain well.
3. Sowed Seeds In Winter
I frost seeded in January of 2021, throwing my seed out the night before a nighttime snow. I prefer to sow native wildflower seeds before a snow because the snow covers the seeds; reducing the chance wildlife will eat the seed and as the snow melts it works the seed into the ground a natural amount (not going to deep). It is very important to have good seed to soil contact and that the seeds are less than 1/8” deep.
St. Louis has cold winters, which means the plants native to this area are used to a cold period before they bloom in the spring/summer (the process of freezing and thawing is known as cold stratification). I only bought one packet of each species so I sprinkled a little of each species in 3-4 locations each, keeping species that prefer drier conditions at the higher part of the yard, and those who like more moisture in the lower area.
4. Waited For Native Seedlings To Grow & Landscaping Upkeep
Then, the waiting began. I was so excited when my first seedling emerged in March. I was still learning about native seedlings and I came to learn that a lot of the species I had coming up were weeds.
By June, the plants were starting to get more distinguished, and I could more easily identify my natives from the introduced species. To be honest, I got a little impatient and bought some potted natives (Rose Verbena, Fire Pink, and Aromatic Aster) to help speed up the process.
By late June/early July, I had plenty of native flowers and the wonderful wild friends they attract. Some of my favorites were the long-horned bees and wavy-lined emerald moth caterpillars.
Throughout the growing season, I pulled up weeds as I found them.
Long Term Native Gardening Results!
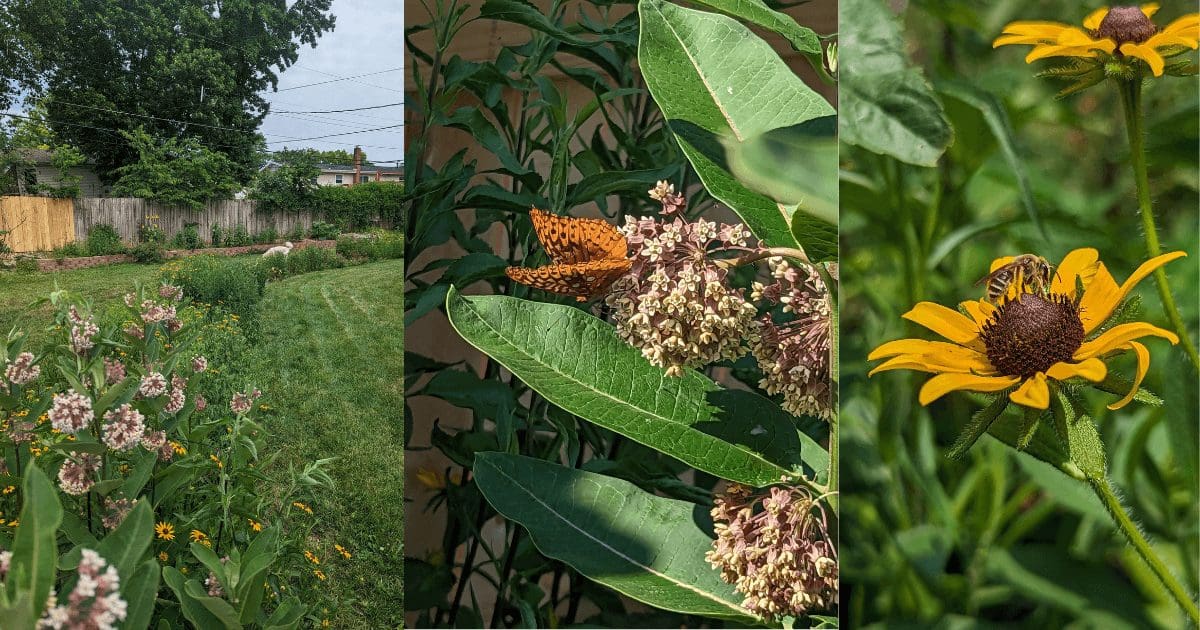
Not only did our basement stop getting leaks from an outdated French drain, but our backyard looked so much better! I already thought native plants were beautiful but seeing them every day and the pollinators they attracted definitively raised my opinion of them even more.
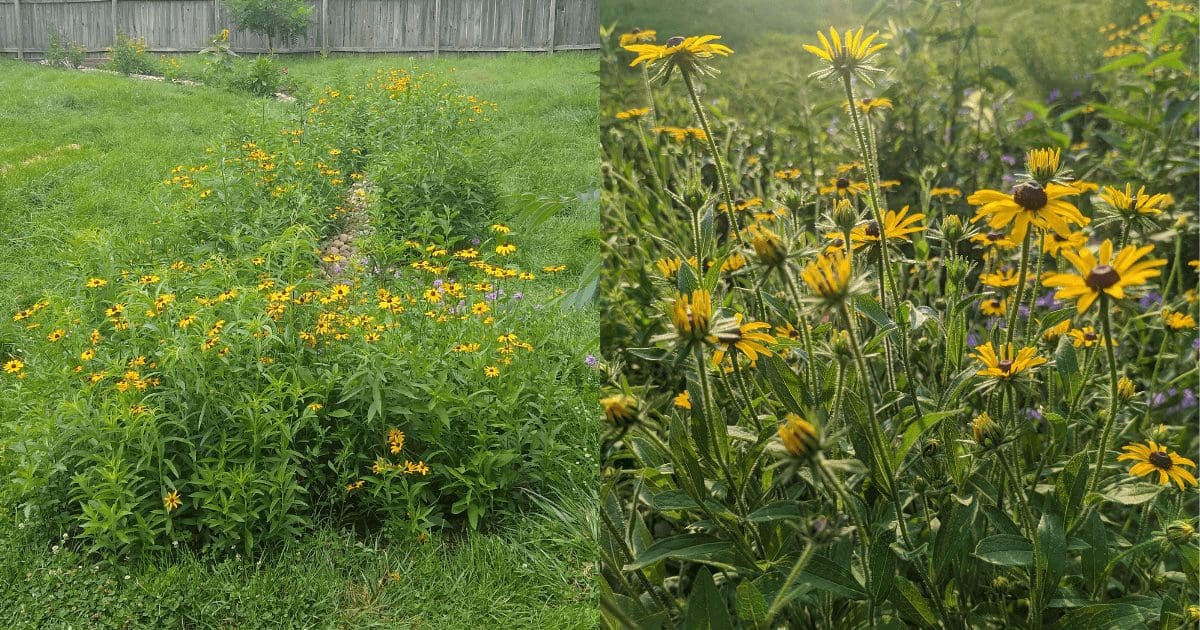
The seeds I chose had several different timelines to appear. Some would appear this season, while others would appear next year or the year after. In other words, the prairie gets fuller and more differentiated each year.
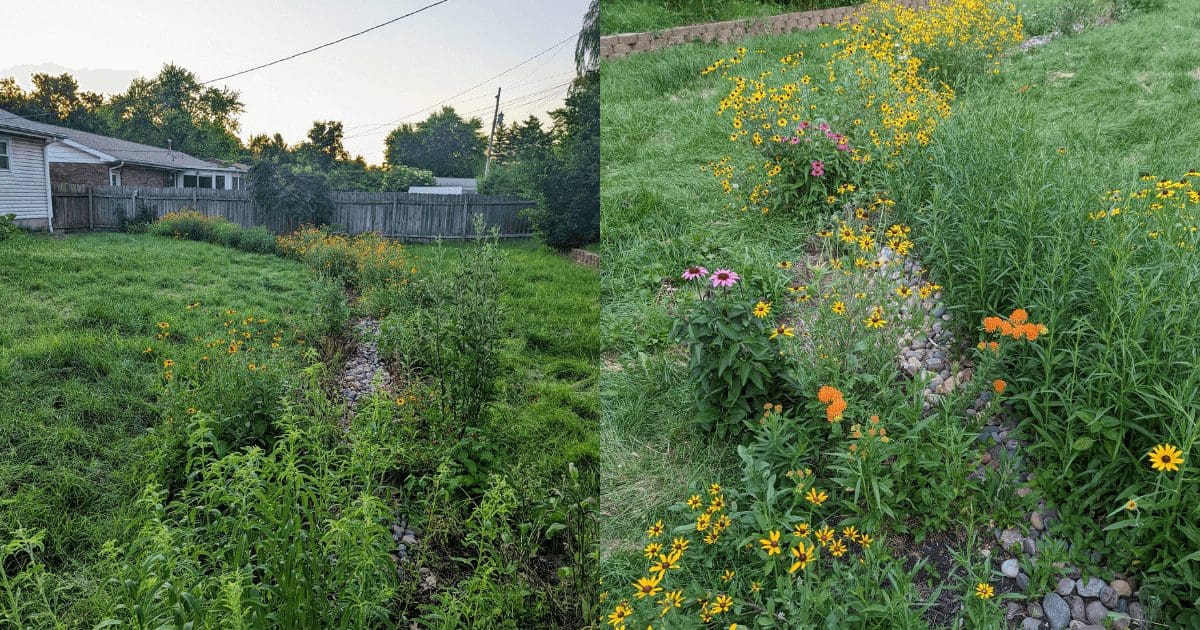
Year 1 Prairie
When a prairie is just starting out, it often looks underwhelming its first year. This is because the plants are putting most of their energy into developing strong roots before focusing on the growth above ground..
Though mowing may seem counterintuitive in gardening, it actually helps manage the inevitable weeds that come through. Many weeds are annual and by not allowing them to grow enough to go to seed you can eradicate them within a year or two.
Here are my Year 1 species that grew: black-eyed susan, lanceleaf coreopsis, blue sage, purple coneflower, and butterfly milkweed.
I also had some volunteers that I didn’t plant but managed to make their way into my yard: late boneset, heath aster, fleabane, Canada goldenrod
Year 2 Prairie
Year 2 the plants started growing earlier in the season. Since the Canada goldenrod was starting to take up a lot of space, I spent more effort cutting it back and treating the end of the stumps.
Year 3 Prairie
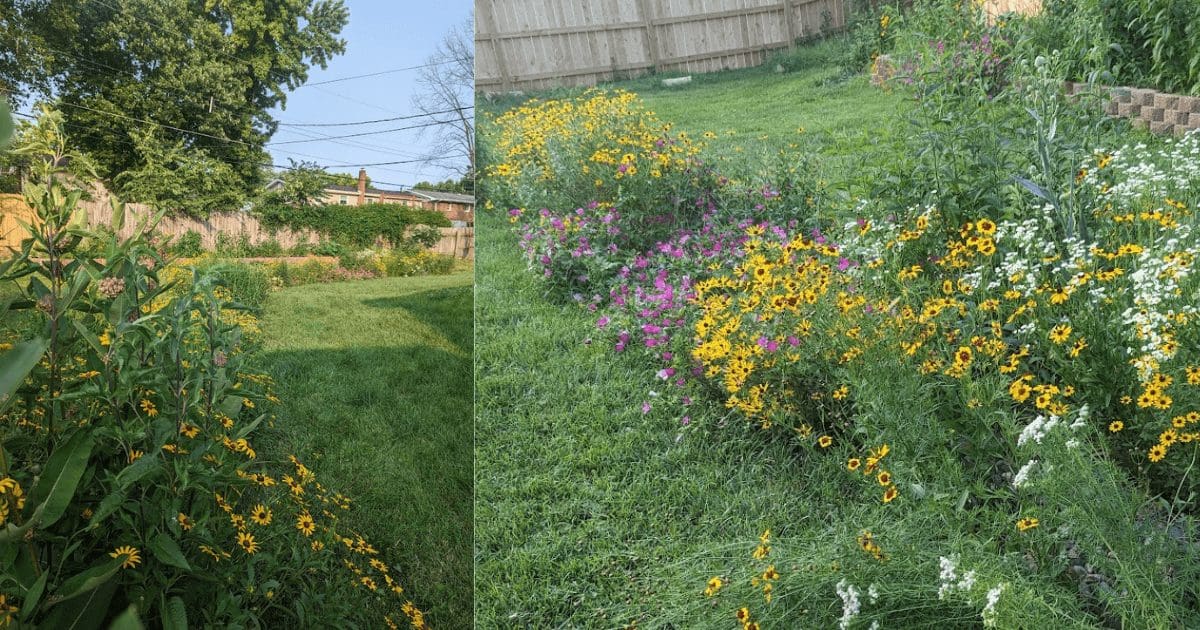
By year three, your prairie should have multiple blooms. The best management practice is to continue mowing or to burn the area during the dormant season (December-February).
#PlantYourLegacy
So far so good!
My #1 Native Gardening Mistake
Since starting at Pure Air Natives, I’ve learned that it is actually recommended to cut back first year plants to ~6” once they reach 18”. This practice keeps a lot of the annual weeds from being able to go to seed while not impairing the growth of your new natives.
The second year, it is recommended to keep cutting back the vegetation through June. Pulling weeds is not recommended due to the disturbance that it can cause to your surrounding natives, except in the case of species with deep taproots. In general, you give weeds a competitive advantage when you disturb the soil, water your planting site, and add fertilizer.
Why It’s Important To Buy Local Native Seeds
There are many native seed suppliers in the Midwest, which is excellent news! Native plants are the best option when it comes to contributing to your local ecosystem. Native plants have evolved with the conditions and fauna where you live.
Interested in wildflowers and grasses native to the central U.S.? At Pure Air Natives, we offer native, germination-guaranteed seeds sourced in Missouri and surrounding states.
Right now, all native wildflower, grass, and sedge seed packets are 40% off! Free shipping when you order 12 or more. Snag them now before they’re gone in 2024.